To use a hardware wallet directly with Sovryn, you will need… a hardware wallet! You should ensure that any hardware you acquire is genuine and has not been tampered with. It is recommended to only purchase from verified sellers and to follow the manufacturer’s guides explicitly, especially when configuring security such as keeping your seed phrase offline and in a safe place. Both official sites can be found below:
Trezor - https://trezor.io/
Ledger - https://www.ledger.com/
¶ Trezor setup guide
¶ Ensure your wallet firmware is up to date
If you find yourself having issues connecting to your Trezor, they recommend installing the Trezor Bridge. It is best practice to keep the firmware up to date. Use Trezor's guide here to update your firmware. Make sure your browser settings have “Block cookies” set to “Disabled” so that Trezor Connect can properly connect to Sovryn.
You can use your Trezor on Sovryn (and RSK in general), but some functions such as sending/checking balances are supported via 3rd party wallets. The outline below is for MyCrypto.
- Plug in and unlock your Trezor device.
- Go to https://app.mycrypto.com/add-account
- Choose Trezor.
- When asked to choose Network choose RSK from the drop-down list.
- Click “Connect to Trezor Wallet” button.
- Type in your PIN Code and passphrase. (Not Seedphrase! Do not share or type in your seedphrase with anyone or to any website.)
- Choose the address you want to interact with from the list.
- Click Import.
Now skip to the “Engaging your hardware wallet with Sovryn section"!
¶ Ledger setup guide
¶ Install Ledger Live
You will need to use Ledger's device management software - Ledger Live.
The ONLY place you should download this software from is Ledger's official site here: https://www.ledger.com/ledger-live/download
¶ Ensure your wallet firmware is up to date
To update Ledger Nano S firmware, use Ledger's guide here.
To update Ledger Nano X firmware, use Ledger's guide here.
¶ Install the ETH App
- Open the Manager in Ledger Live.
- Connect and unlock your Ledger device.
- If asked, allow the manager on your device.
- Find ETH in the app catalog.
- Click the Install button of the app. An installation window will appear. Your device will display Processing... Then, the app installation is confirmed.
¶ Install the RSK App
Now you will need to complete the same steps to install the RSK app to your Ledger device.
- Open the Manager in Ledger Live.
- Connect and unlock your Ledger device.
- If asked, allow the manager on your device.
- Find RSK in the app catalog.
- Click the Install button of the app. An installation window will appear. Your device will display Processing... Then, the app installation is confirmed.
¶ Enable the Blind signing (EX Contract data) in settings
Note that the name of the setting has changed from Contract data to Blind signing for clarity purposes.
To enable Blind signing:
- Connect and unlock your Ledger device.
- Open the Ethereum application.
- Press the right button to navigate to Settings. Then press both buttons to validate.
- In the Blind signing settings, press both buttons to allow contract data in transactions.
The device displays Enabled. - Now navigate into the RSK application.
- Press the right button to navigate to Settings. Then press both buttons to validate.
- In the Blind signing settings, press both buttons to allow contract data in transactions.
The device should display Allowed.
¶ Engaging your hardware wallet with Sovryn
¶ Overview
Your hardware wallet can interact in two ways with Sovryn. First, it can directly engage with the dapp to trade, lend, borrow, provide liquidity, participate on origins, bridge and stake. This section explains how to set up your hardware wallet to do all that. Second, it can send your assets from your wallet to destinations other than Sovryn smart contracts, usually to another wallet you own, to an exchange, or even to wallets of your friends or family. Since only you have the keys to your wallet and Sovryn doesn't, you must do these transactions manually. You can learn that from How to send RSK assets from Hardware Wallets on this page.
¶ Engage your wallet
When interacting with some hardware wallets, like the Ledger hardware wallet, note that the device will not allow you to access certain paths, such an RSK, without downloading the appropriate software for the device. An RSK path would require the RSK app to be downloaded via Ledger Live. Then, when accessing your wallet through MyCrypto or another web3 wallet, you would need to ascertain that the appropriate app is open on the device. Below are the steps to engage your hardware wallet with Sovryn.
Step 1: Navigate to live.sovryn.app
Ensure that you have updated the dApp if prompted to do so.
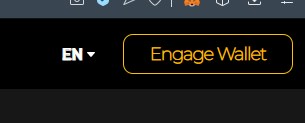
Step 2: Click the ‘Engage Wallet’ button in the top right of your screen:
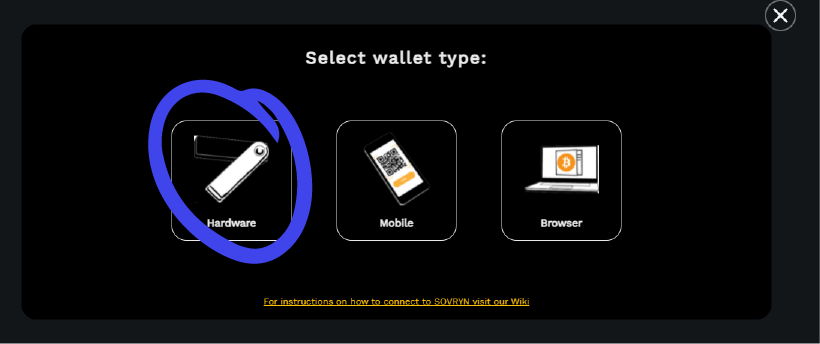
Step 3: Now select ‘Hardware Wallet’ from the wallet selector pop-up:
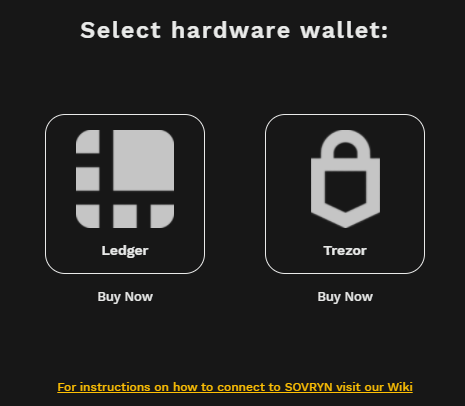
Step 4: Select Ledger or Trezor:
Step 5: Now, plug in and unlock your hardware wallet. Ledger users, ensure that you have the RSK app open.
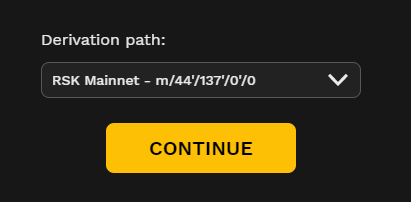
Step 6: You should now select the Mainnet derivation path as shown below and press continue:
Step 7: Once your wallet is connected to Sovryn you will be able to view and select one of your wallet's many addresses to engage with Sovryn.
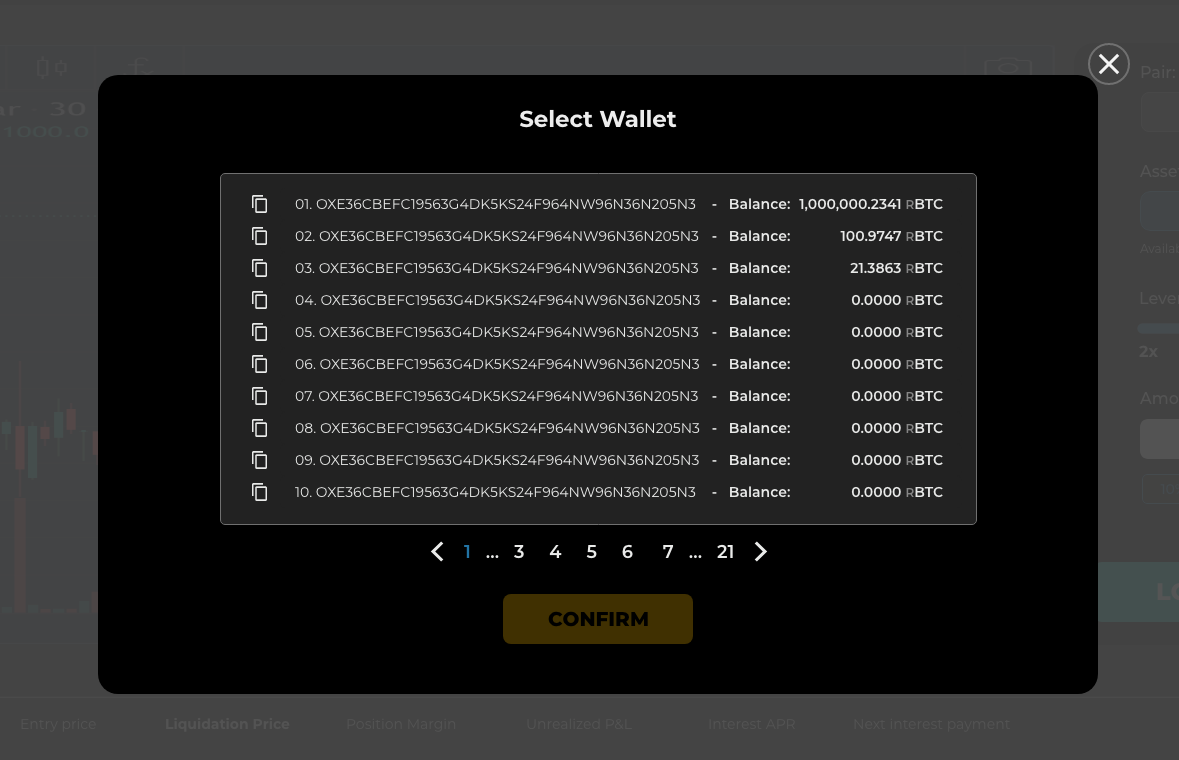
Step 8: Once you select an address to use, hit the ‘CONFIRM’ button. You are now ready to use Sovryn directly with your hardware wallet!
¶ How to send RSK assets from hardware wallets
Hardware wallets can directly interact with Sovryn dapp. Sovryn is a set of smart contracts that manages the assets sent to it. Sovryn smart contracts don't control the assets in the user's wallet. Users can send the stored assets in their wallet to destinations other than Sovryn smart contracts by connecting their hardware wallet with compatible web3 wallet services. Note that by connecting your hardware wallet to these services you are not exporting your private key to those services but just importing the public key of your hardware wallet. These services will never have access to your private key, and all the transactions will still have to be manually verified by the user using their hardware wallets.
Below are the steps to connect your hardware wallet with some of the recommended web3 wallets.
¶ How to use MyCrypto Wallet with hardware wallets
MyCrypto is a powerful open-source wallet toolbox that allows you to manage privately and securely your Ethereum accounts and supports a wide variety of different networks including RSK. The different types of networks that MyCrypto supports are all based on the original Ethereum codebase.
Below are the steps to connect your Hardware Wallets with MyCrypto:
¶ With Ledger
Below is a process you can follow to send your RSK assets from your Ledger device, if you have assets to one of your Ledger addresses:
- Plug in and unlock your Ledger device and open the RSK app on your ledger.
- Go to https://app.mycrypto.com/add-account
- Choose Ledger.
- When asked to choose Network choose RSK from the drop-down list.
- Click “Connect to Ledger Wallet” button.
- Type in your PIN Code.
- Choose the address you want to interact from the list.
- Choose "Send Assets" from the Dashboard.
- Choose the asset you want to send in the “Asset” section.
- Choose from which wallet you have to send (if you have connected multiple wallets) in the "Sender" section.
- Fill in the address of the wallet to which you want to send your assets in “Recipient” section,
- Fill in the amount you want to send in the “Amount” section.
- Choose the transaction fee you want using the slider in the “Transaction Fee” section.
- Click “Show Advanced Options” to manually add the Gas Limit and Gas Price.
- Click “Next” Button.
- On the next page you will see all the details you filled so you can check if everything is correct.
- Click “See More Details” to see a list of comprehensive details.
- Confirm the Transaction on your Ledger.
- Click “See More Details” again to view your transaction status.
¶ With Trezor
Follow this process to send your RSK assets from your Ledger device, if you have assets at one of your Ledger addresses:
- Plug in and unlock your Trezor device.
- Go to https://app.mycrypto.com/add-account
- Choose Trezor.
- When asked to choose Network choose RSK from the drop-down list.
- Click “Connect to Trezor Wallet” button.
- Type in your PIN Code and passphrase. (Not Seedphrase! Do not share or type in your seedphrase with anyone or to any website.)
- Choose the address you want to interact from the list.
- Click Import.
- Choose "Send Assets" from the Dashboard.
- Choose the asset you want to send in the “Asset” section.
- Choose from which wallet you have to send (if you have connected multiple wallets) in the "Sender" section.
- Fill in the address of the wallet to which you want to send your assets in “Recipient” section,
- Fill in the amount you want to send in the “Amount” section.
- Choose the transaction fee you want using the slider in the “Transaction Fee” section.
- Click “Show Advanced Options” to manually add the Gas Limit and Gas Price.
- Click “Next” Button.
- On the next page you will see all the details you filled so you can check if everything is correct.
- Click “See More Details” to see a list of comprehensive details.
- Confirm the Transaction on your Trezor.
- Click “See More Details” again to view your transaction status.
¶ How to use Metamask with hardware wallets
When the Metamask web wallet is installed, a user is granted an ERC-20 address on which an RSK-mainnet network can be set. This is the user's first and default address on Metamask. After configuring RSK mainnet settings on that wallet and switching to it afterward, this originally ERC-20-specific address now acts as an address for RSK-native assets such as SOV, rBTC, rUSDT, and others. Below are the steps to add your hardware wallet accounts to Metamask.
¶ Ledger
Follow these steps to connect your Ledger to Metamask:
1.) Connect and initiate your Ledger to your PC.
2.) Install and log in to the Metamask wallet.
3.) Click the circle button on the top right corner and select the Add the Hardware wallet option.
4.) Enter the PIN in your Ledger.
5.) Choose the address you want to use from the list.
A user can set up an RSK mainnet network on top of these two addresses. From that point, users can add additional addresses and use them for sending the RSK-based Portfolio funds between various Sovryn ecosystem accounts, using the Send function of the Metamask GUI. Users can also use the “Send between my addresses” function to safely interact only with their own user addresses.
¶ Trezor
Trezor users can use the Trezor-generated ERC-20-based addresses as a Metamask middleman by setting an RSK Mainnet network there. Then, they will just add the Trezor ERC-20 addresses as another account to their Metamask profile.
To connect your Trezor wallet to the Metamask:
1.) Connect and initiate your Trezor to your PC.
2.) Install and log in to the Metamask wallet.
3.) Click the circle button on the top right corner and select the Add the Hardware wallet option.
By following this topic, a Trezor user will already have two Metamask addresses that initially started as ERC-20 addresses (designed for the Ethereum network):
- the one that is granted by installing Metamask
- the imported Trezor Hardware wallet
A user can set up an RSK mainnet network on top of these two addresses. From that point, users can add additional addresses and use them for sending the RSK-based Portfolio funds between various Sovryn ecosystem accounts, using the Send function of the Metamask GUI. Users can also use the “Send between my addresses” function to safely interact only with their own user addresses.
¶ Why connecting with Metamask shows different addresses
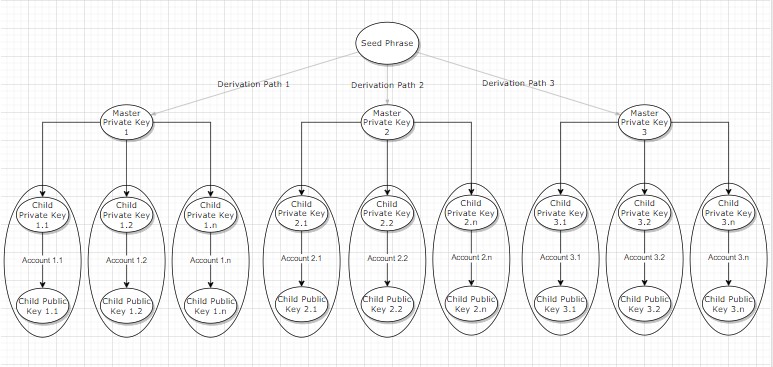
When a wallet is installed, it provides a seed phrase (recovery phrase). The wallet then derives a master private key from this seed phrase. Additionally, multiple master private keys can be derived from a common seed phrase. By using one derivation path the wallet derives a master private key, and by using another derivation path the wallet derives another master private key. All these master private keys are derived from a common seed phrase. From the generated master private keys, multiple or even an infinite number of child private keys can be generated, each one being a new account generated from your master private key. Each account has its own public key and is used to store your assets.
Public keys are derived from private keys, but it is not mathematically possible to derive private keys from public keys. This is why it is safe to share your public keys. At any time, a whole set of accounts corresponding to different derivation paths can be regenerated just using your seed phrase. Therefore, the seed phrase must be safely stored.
Since RSK is EVM compatible, it is possible to store RSK assets on an Ethereum address and vice-versa. Even thought it is not recommended, you will not lose your funds if you send your RSK assets to an Ethereum address and vice versa but ONLY if you control the private key of the address to which you send your assets.
If you connect your hardware wallet with Metamask, Metamask uses the Ethereum derivation path(m/44'/60'/0'/0) to generate the master private key and associated accounts. The addresses you get with other wallets may be different from Metamask because of the difference in private keys from which the public addresses are generated.
- Currently, there is no support for direct Trezor-Sovryn app communication, but users can use the services of MyCrypto.com as a workaround.
- We are currently looking to improve this functionality in the Sovryn dApp so that you can transfer RSK-based funds from your Portfolio the same way as with a browser wallet.